MONTH 8 BLOCKS: Variations with Half-Square Triangles
Notes about the Hourglass blocks:
If you continue on from the Half Square Triangle (HST) blocks from Month Six you can create hourglass blocks. The instructions here start with 5-1/5” squares of fabric, but you can make them bigger or smaller. Starting with 5-1/2” squares, you end up with 4-1/2″ blocks (4” finished). If you’re a super precise sewer, these could be trimmed to 4-3/4″ unfinished, but trimming the blocks to 4-1/2” gives you some wiggle room. Bill likes to trim to 4-1/2″ using the rulers he has.
You could make an entire quilt from these blocks, but they also work well for borders.
Hourglass cutting instructions:
From Red fabric: Cut (1) 5.5”x5.5″ square
From White fabric: Cut (1) 5.5″x5.5″ square
Hourglass piecing instructions:
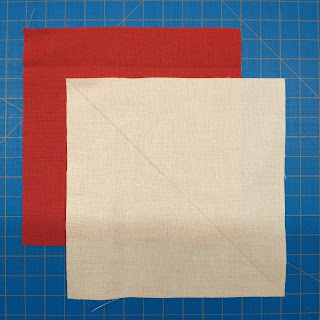
2. Stack the two squares and sew a seam ¼” from the marked line, repeat on the other side. Press and and then cut along the drawn line.
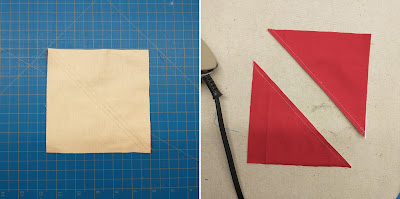
3. Open up each HST, pressing the seams towards the dark fabric. Tip: If you start with the dark fabric on top, this happens without thinking about it.
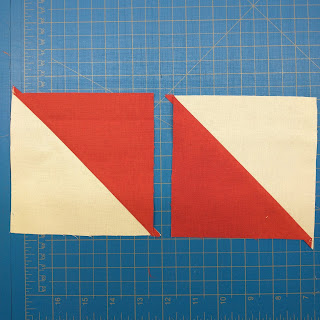
4. Draw a diagonal line on the wrong side of one of the HST blocks perpendicular to the sewn seam. Then stack the two HSTs so the seams nest. and sew two seams 1/4″ from either side of the drawn line like before.

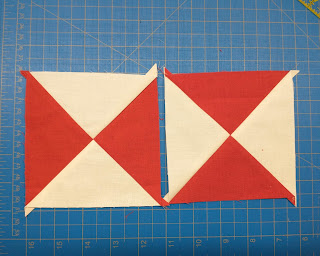
5. Sew two seams 1/4″ from either side of the drawn line like before. Press, cut along the drawn line and open the blocks. Now you can twirl or spin the seams. Depending on your stitch length and thread they may open up easily or you may have to use a seam ripper to unsew a stitch or two. Manipulate the seam allowances so they all “rotate” around the block in one direction and coax the center open like a flower. One will go clockwise, the other block will be counter clockwise.

5. Press the blocks well, using a bit of starch if needed, and square them up to 4-1/2″. Make more as needed.
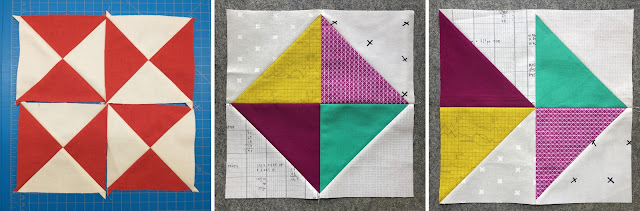
Notes about the Triangles Variation blocks:
Each of these blocks are made of four half-square triangles. I made four sets of two-at-a-time HSTs, each in a different set of colors (all of them using a saturated foreground color with a neutral background. Then I combined each set of four as shown below to make the two variations.

I started with 6″ squares, then trimmed each HST to 5-1/5″. This results in 10″ finished blocks (10-1/2″ unfinished) when the four HSTs are pieced together. You can, of course, size them bigger or smaller according to what works for your design.
